Overview
This reference has been created to save you time and effort when wanting to implement eCommerce tracking in Google Analytics for your bookings. To implement the tracking you will need a basic understanding of WordPress coding, have implemented Google Analytics and have a basic understanding of Google Tags.
- This guide will walk you through adding additional code to your theme function.php file
- Adding your confirmation page redirect
- Developing your Google Tag
There is an expectation that you have set up Google Analytics across your website with eCommerce enabled and have created a Google Tag account which is linked to your Google Analytics account. If you have not done this, there are plenty of reference on the web.
Adding code to the functions.php file
The first step is we are going to edit the theme function.php file and add some additional code, which we are going to reference later. The purpose of the code is to ensure that we pass the necessary values in the correct format.
The WP Booking System id for example includes a # tag at the start, unfortunately this cannot be passed via the URL so we are going to have to remove it. Instead we are going to replace the # with a Alpha value, in the example below I have used ‘B’. The purpose of this is that Google has a known issue when it comes to using only numeric values as transaction ID’s. On a large number of occasions it switches the numeric transaction value to (not set), making the reports less than useful.
It should be noted that you can change the value of ‘B’ to anything in the code below.
One of the other know issues is the ‘Total Amount’. The Total amount Dynamic Variable in WP Booking System adds a leading $ sign, however Google Analytics won’t except this, so we need to remove it and only pass the value as a numeric value.
The code below will help resolve both the # and $ symbols and provide 2 new dynamic variables we can use for Google Analytics
- {Booking ID Prefixed} example returned B6571
- {Total Amount Unformatted} example returned 440
Form Redirect
To use the code you will want to modify your Form Options → Form Confirmation and change the confirmation type to ‘Redirect to a Page’. We are going to build the query parameter part of the URL using the following dynamic variables.
There are 2 parts the Key and the value. key1=value
- sd={Start Date}
- ed={End Date}
- sid={Calendar Title}
- nights={Number of Nights}
- gid={Booking ID With B}
- tt={Total Amount Unformatted}
You can name the keys anything you want, in my case I like to keep them as short as necessary. You can also add other values if you wish to track additional information. However the above are the mandatory values required.
This is what your final redirect URL may look like.
https://yourdomainname.com/booking-confirmed/?sd={Start Date}&ed={End Date}&sid={Calendar Title}&nights={Number of Nights}&gid={Booking ID Prefixed}&tt={Total Amount Unformatted}
Now that we have our URL values we need to pass this information to Google Analytics and indicate that it is purchase information.
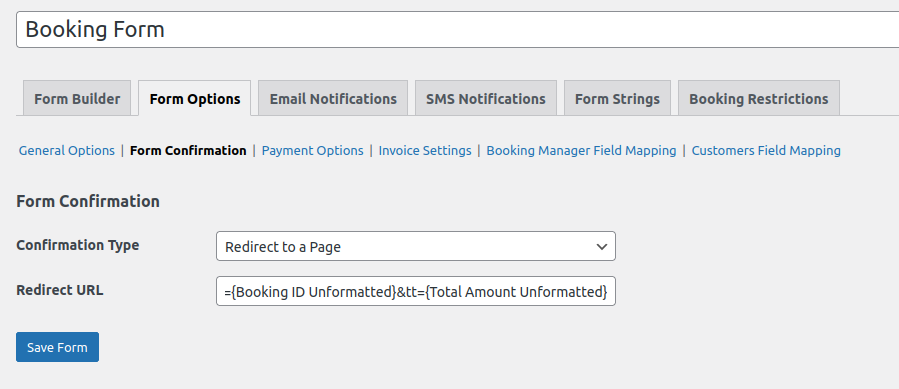
Now that we have our URL values we need to pass this information to Google Analytics and indicate that it is purchase information.
To do this we are going to need to use Google Tags to assist us.
Google Tag manager
There are 2 parts necessary to building the Tag that we are going to use, variables and triggers.
Variables
For each of the dynamic tags above we will need to create a variable in Google Tags. Below is the example of the nights variable being created.
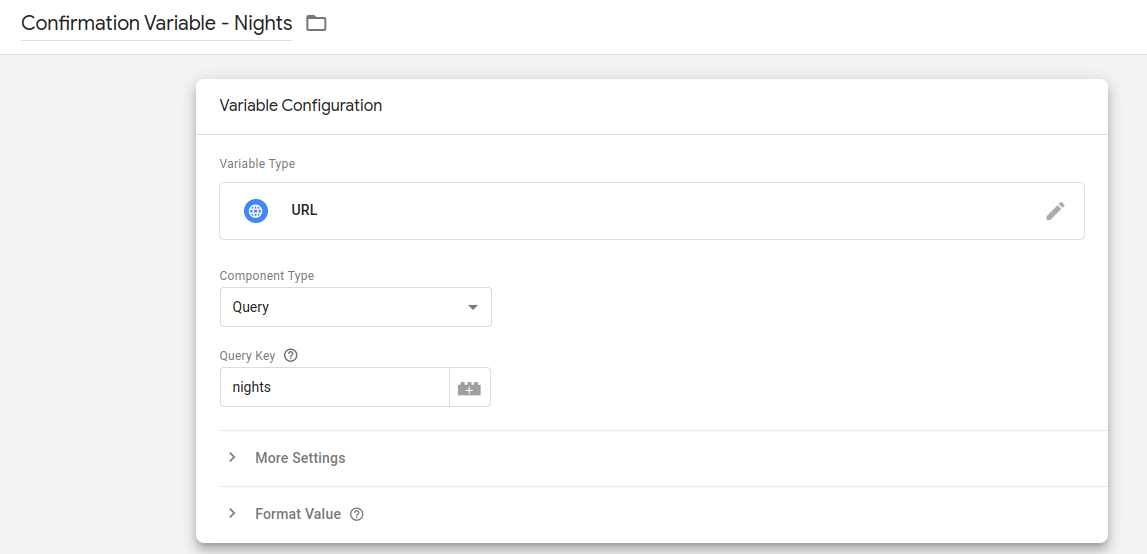
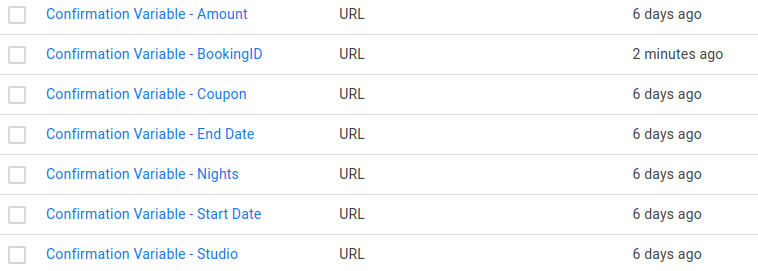
For each of the above values and and additional variable you want to pass, you will need to create a variable for each one. When finished your user-defined variables should look something like this.
Once you have created these variables you will want to group them into one variable with the Variable Type set to ‘Google Tag: Event Setting’
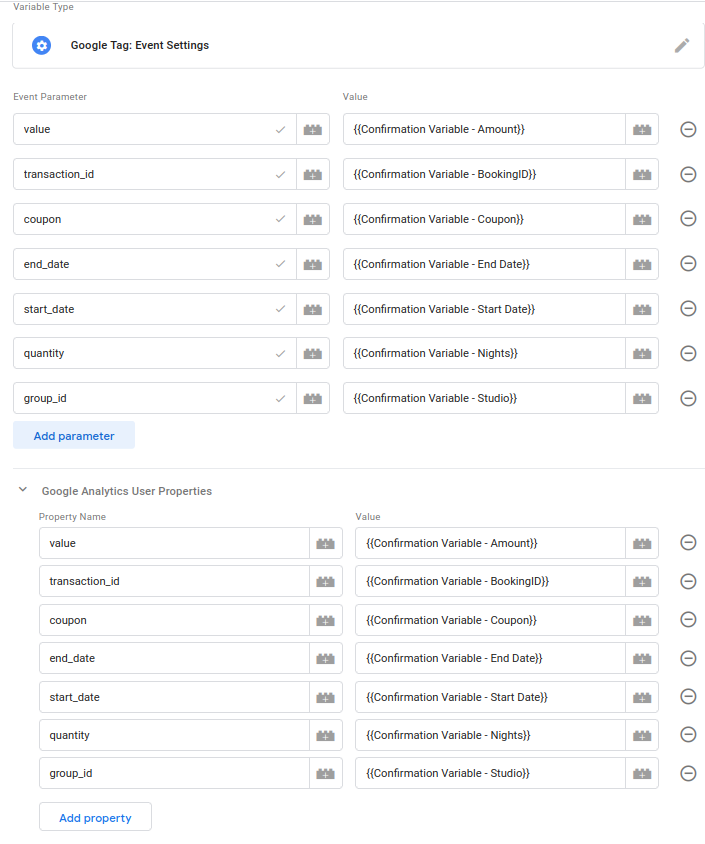
I have save this with the variable name ‘Accommodation Purchase Variables’.
Triggers
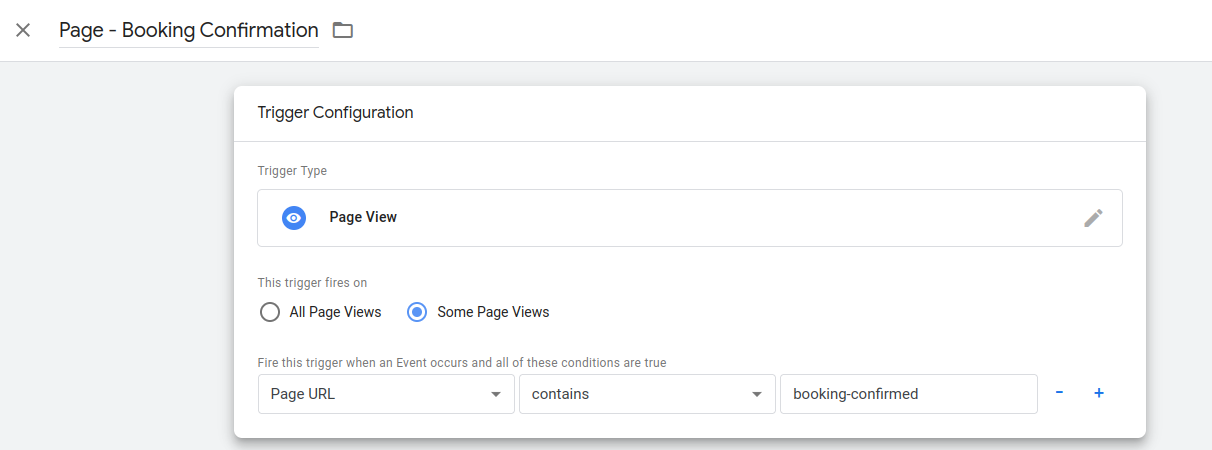
Onto the trigger. The purpose of triggers is to to tell Google when we should capture these values, as we don’t want Google attempting to capture this information on every page. So we will instruct Google to capture the information on the confirmation page after the purchase.
Tags
Now that we have created our Trigger and we have our variables, we need to bring all this information together in a Tag.
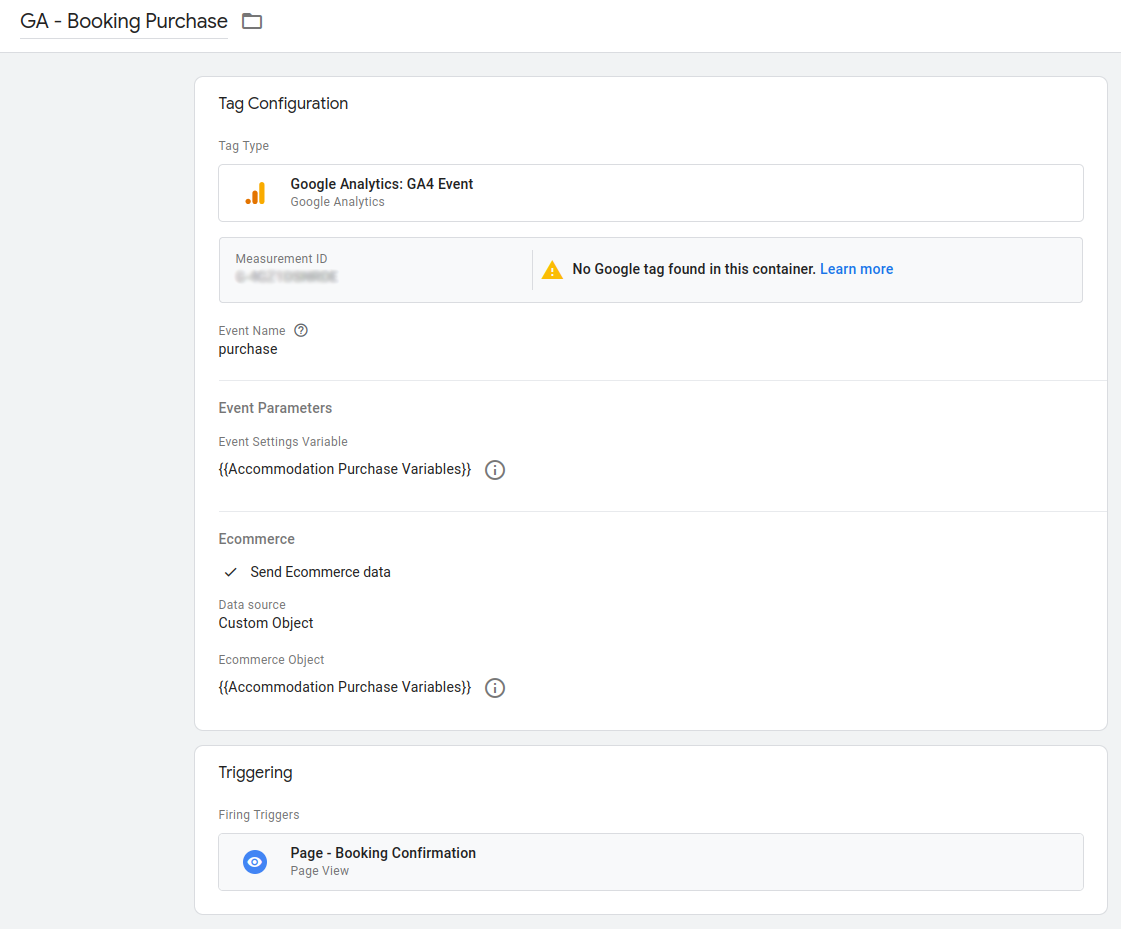
Now you have all the necessary parts to track your booking purchases in Google Analytics you can test it using Google Tag preview. It would be advantageous to also have Google Analytics debug mode open to ensure that it picks up the purchase information. You can also create additional tags to pass information to Google Ads to identify a purchase and ensure you don’t target these customers in the future.
