Email notifications
You can create as many email notifications as you need, set different triggers for sending emails, and even configure conditional logic to tailor the content based on the booking data. For example, you can send a different email notification depending on the payment method the customer used.
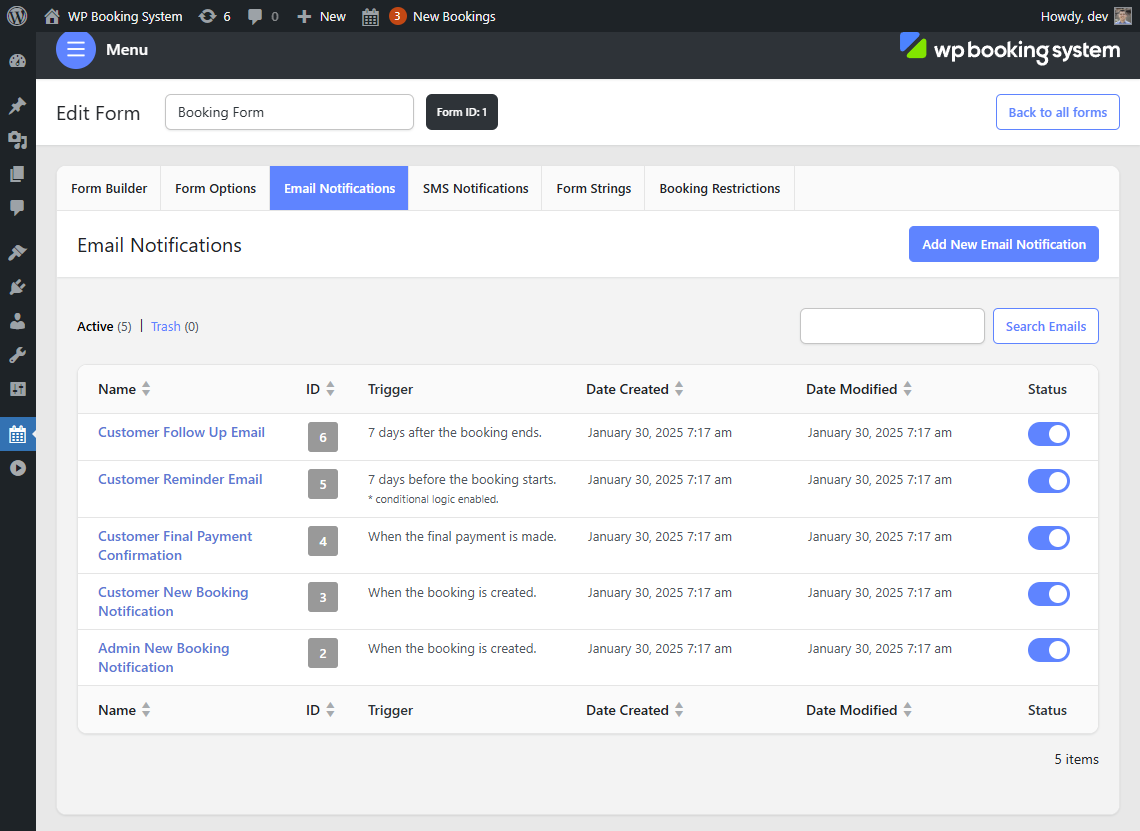
Adding a new email notification
To add an email, go to the Email Notifications tab and click the ‘Add New Email Notification’ button. A form will appear where you can enter the email’s name. This name is not visible to the customer; it is only used to identify the email within the plugin. You also have the option to select an email template, which pre-fills the email with sample text and predefined settings.
When creating a new form, an Admin Notification is automatically generated.
All emails can be enabled or disabled by toggling the ‘Status’ switch on the listing page.
Editing the email notification
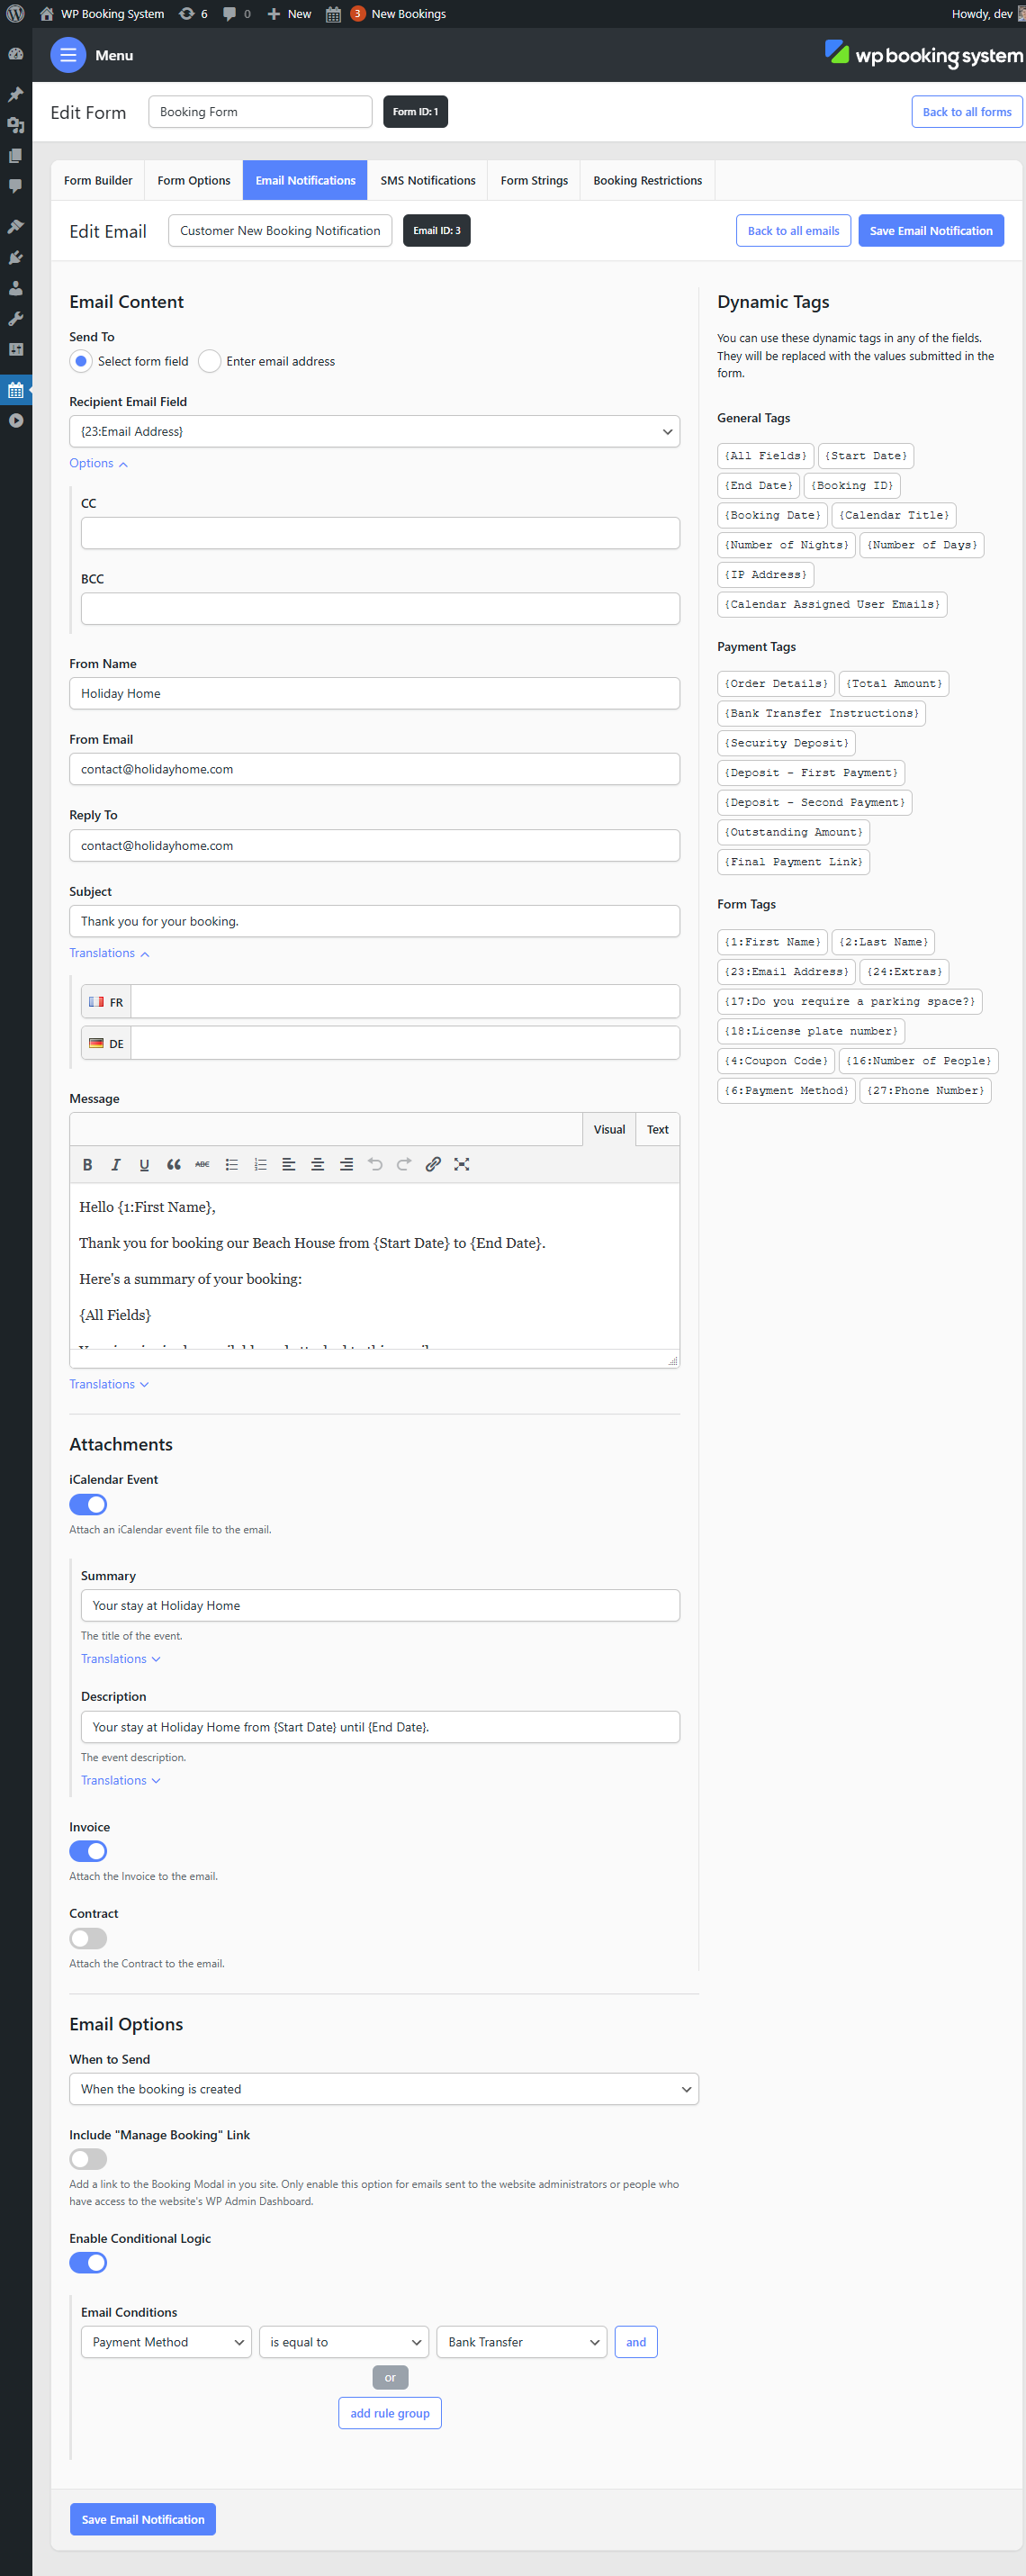
| Send To | Select the recipient type. It can be a dynamic email from a “Email” type form field, or you can manually type in an email address. |
| Recipient Email | Select the “Email” form field from the form, or type in an email address. |
| CC | An email address where to send a copy of the email. This email will appear in the email headers and all other recipients will see it. |
| BCC | An email address where to send a copy of the email. This email will be hidden from the email headers. |
| From Name | The sender’s name. |
| From Email | The sender’s email address. For better deliverability, use an email address from the same domain as your website. |
| Reply-To | An optional Reply-To email that will be used instead of the “From Email”. Useful if you want to use your personal email address instead of your domain’s one. |
| Subject | The subject of the email. |
| Message | The message. |
| iCalendar Attachment | Option to attach an .ics file to the email, containing your booking dates and some details. |
| Summary | A short summary to describe the event. |
| Description | A description for the iCalendar file attached to the email. Both the Summary and Event will appear in the customer’s calendar if they add the event. |
| Invoice | Attach the invoice to this email. Only available if the Invoices add-on is installed. |
| Contract | Attach the contract to this email. Only available if the Contracts add-on is installed. |
| When to Send | Select the trigger for when to send the email. The options are: – When the booking is created – Before the booking starts – After the booking starts – Before the booking ends – After the booking ends – When the final payment is made |
| Day Offset | If it’s a scheduled email (before or after the booking starts or ends), you will have to select how many days before/after to send the email. |
| Include “Manage Booking” Link | Add a link to the Booking Modal in you site. Only enable this option for emails sent to the website administrators or people who have access to the website’s WP Admin Dashboard. |
| Enable Conditional Logic | Set up conditional logic for this email. |
You can use Dynamic Tags in all the fields above.
Using a third-party email in the From Email field may prevent your email from being delivered. It is best to use an email with the same domain as your website.
