Inventory add-on
This add-on will allow you to accept a limited number of bookings per day.
The inventory add-on is not compatible with iCalendar feeds.
You do not need this add-on if you accept only one booking per day, or an unlimited number of bookings per day.
Managing inventory
After installing the add-on, a new column will appear in the calendar editor called Inventory. It will also create an options box allowing you to set the default inventory which will be applied to all the dates.
The inventory add-on requires the Automatically Block Dates option to be enabled when embedding the calendar.
After each booking made, the inventory for the booked dates will be decreased by 1 (or the number of slots booked, see below), until it reaches 0. When it reaches 0, the dates will be automatically set to booked.
Booking multiple slots at a time
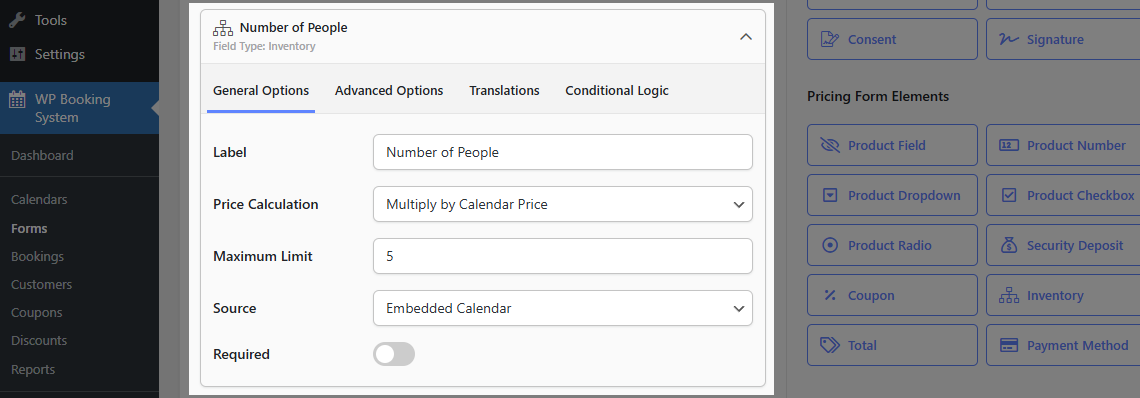
The add-on also adds a new form field called Inventory. This will create a dropdown allowing the customer to select how many slots they want to book. The field will automatically be populated with values from 1 to the maximum number of slots available for that date selection. You can set a limit to the maximum number of slots that can be booked at a time by adding a number in the Maximum Limit field.

Inventory Source
You can add multiple inventory fields to your form and set each field to pull inventory from a different calendar. This feature is especially useful if you are renting out additional items with limited availability.
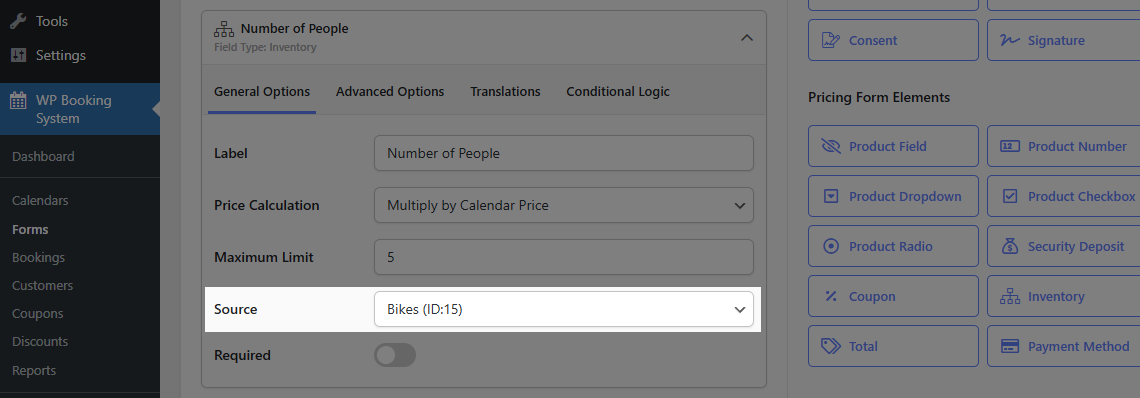
For instance, if you have 3 villas and 10 bikes for rent, you can include an inventory field in your form specifically for bike rentals. This allows customers to choose the number of bikes they wish to rent, with the field automatically updating based on the available bikes listed in the Bikes calendar.

Setting the “Source” option in the Inventory field to “Embedded Calendar” will use the inventory from the calendar attached to the booking form. Setting it to any other calendar will use the Inventory from that calendar.
An additional booking will automatically be created in the other calendar and it will show an “Automatically Created” tag.
If you want to assign a price to the external Inventory field, you can do so by adding a Product Field to form, set a price and set the Multiplication field to the Inventory field.
