WooCommerce integration
With this add-on, when a customer makes a booking, you can offer the possibility to checkout through WooCommerce, allowing them to pay through any of the payment gateways available for WooCommerce. You can see a list of available payment gateways here.
Please note that the WooCommerce Checkout add-on does not allow your customers to book WooCommerce products, it only makes use of the checkout functionality to allow customers to pay for the bookings.
Create a WooCommerce Product
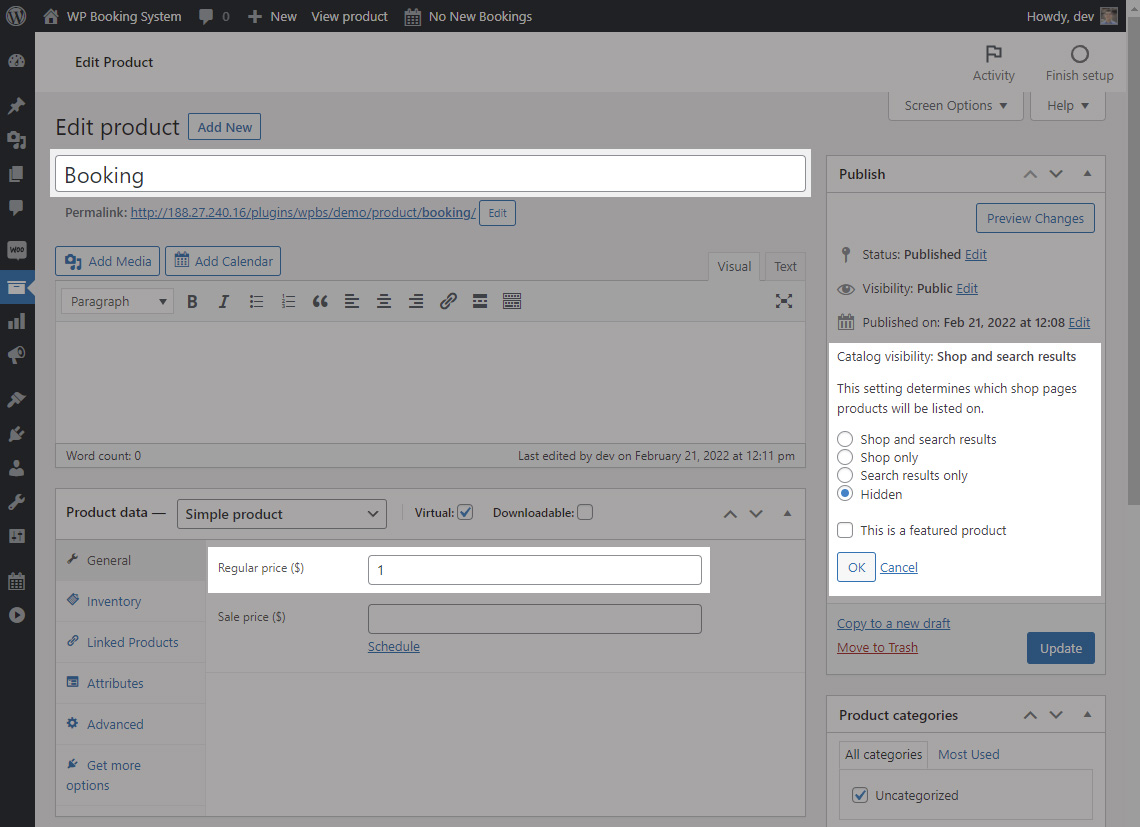
- Create a new WooCommerce product, which WP Booking System will use for handling the payment.
- Give it a name, something like “Booking” or “Reservation”, your clients will see this during the checkout process.
- Set a price, any price. It doesn’t matter as it will be overwritten with the actual price of the booking. Usually “1” works well.
- Make it a “Virtual” product
- Set the “Catalog Visibility” option to “Hidden”.
- Set the “Tax Status” to “None”. This option only appears if you have taxes enabled.
- Publish the product.

Configuring the add-on

| Active | Toggle whether or not this payment method is active. |
| Display Name | The name of the payment method displayed in the Payment Method form field. |
| Description | A description of the payment method displayed in the Payment Method form field. |
| Pay Button label | The label of the “Pay” button on the plugin’s checkout page |
| WooCommerce Product | The WooCommerce product you have created in the step above. |
| Booking Creation Trigger | Choose when to create the Booking depending on the WooCommerce Order status. Please note that not creating the booking when the order is created may lead to double bookings if WooCommerce is not set up correctly. |
| Disable WooCommerce Emails | If you configured your WP Booking System form to send a User Notification when a booking is made, you can disable the WooCommerce emails that are sent to the customer when an order is completed to avoid sending the customer too many emails. |
| Disable WooCommerce ‘Thank You’ Page | After an order is made, you are taken to WooCommerce’s Thank You page. Enable this option if you want to be redirected back to the Calendar page and display the confirmation message you set up WP Booking System. |
Checkout field mapping
You can automatically fill in the customer’s details on the checkout page by setting up the field mapping in the form options.
